Deicing or Thawing (Melting Ice) Interior of Reefer Containers
If you utilize reefer containers to store frozen product, at some point you’ll be dealing with ice buildup on the interior. This is primarily due to door openings and/or the product stored inside of the reefer container.
In this post, we’ll address those issues and provide some helpful tips to minimize or avoid this scenario.
Door Openings
If the doors are left open (while the unit is running), the cooling system works much harder to keep your items cold (causing a strain on the compressor and condenser). During this time period, the warm/cold air displacement increases tremendously. The cold air rushes out of the unit and the warm air/moisture is being pulled into the unit. When the doors are eventually closed, the moisture trapped inside the unit will freeze. If this process is repeated over time, there can be a significant ice buildup.
Product
Another major contributor to ice forming/buildup, can be attributed to the product. If the product being loaded into the unit is warmer than the interior air temp, you’re introducing moisture inside of the unit. Eventually, the moisture from the product will freeze and over time ice will build up on the interior.
Consequences
Ice will start to form behind the interior panel/wall of the cooling system. This is where the airflow originates and is pushed into the unit through the t-rail floor. As the ice continues to build up behind this panel, it will travel down the wall and become visible where the panel meets the floor.
If left unchecked, the ice will continue to build up and will begin to form between the rails of the flooring. At this point, you run the risk of airflow being restricted. In turn, this can cause the unit stop cooling all together. If the unit continues to run under these conditions, it could cause mechanical failures as well.
Deicing or Thawing Procedure
Step 1 - In order to deice or thaw the interior, the unit it will need to be empty.
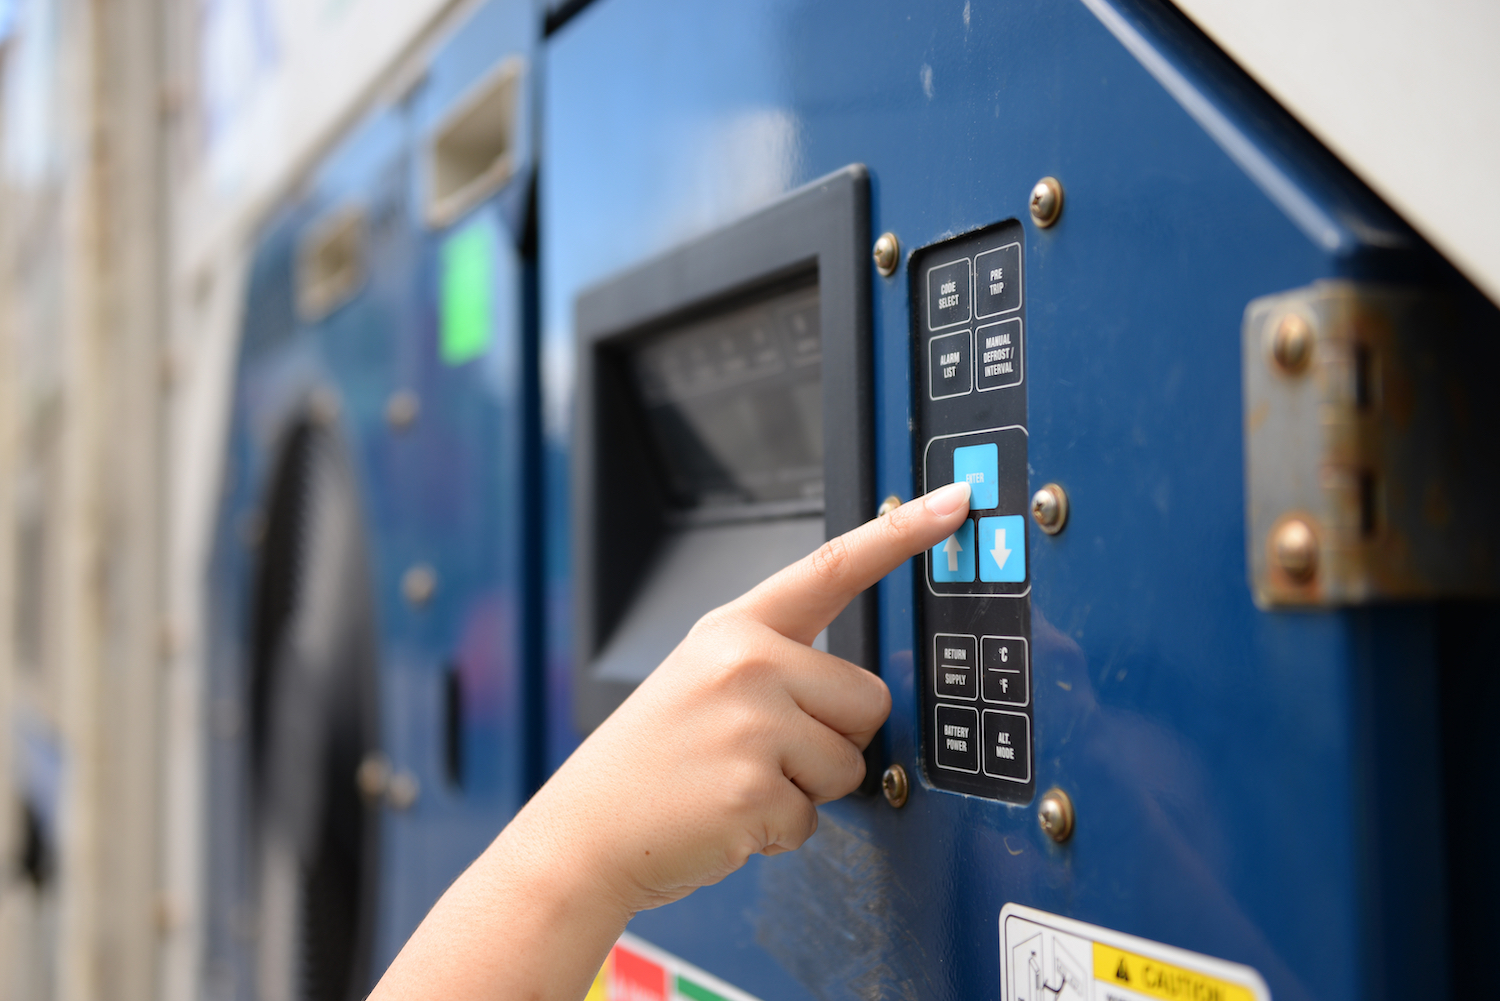
Step 2 - Once it is empty, adjust the temperature up to 75-80 deg F (or as high as it will go). Most Carrier™ or Thermo King™ models can heat up to at least this temperature threshold.
Step 3 – Once the new set point is locked in, be sure to leave the doors closed. This process could take several hours depending on how much ice has accumulated. To be safe, it’s best to let the unit run at this temperature setting overnight.
Step 4 – Check to be sure the ice is no longer visible. To do so, you will notice a hinged section of sheet metal (the air chute or baffle) where the front wall panel meets the floor. Lift the baffle from the bottom to expose the area behind the panel. If the unit has been thawed out properly, you won’t see any ice behind that panel.
Step 5 – Make sure there’s no standing water on the floor and that the interior is completely dry.
Step 6 – Adjust the set point back to the desired setting for your product, let the unit come down to temp and load your product back into the unit.
Solutions/Prevention
Here are some helpful tips to minimize ice buildup inside of your unit –
Powering the Unit Down - If your unit is not equipped with an automatic shut-off feature, you should power the unit down prior to opening the doors to access the product. This won’t prevent warm air from being trapped inside of the unit when you close the doors. However, it will minimize the vacuum effect and won’t displace as much of the cold air (inside of the unit) with the warm air (outside of the unit).
Avoid Warm Product – Be sure that the product is close to or at temp prior to loading it into the unit. The warmer the product, the more you increase the probability of moisture freezing on the interior/restricting airflow/causing mechanical failure.
Run Manual Defrost Cycles – Depending on the setting, your unit will defrost automatically as needed or at the frequency of your choosing. However, initiating a manual defrost cycle daily (or at least several times a week), can be can go a long way in minimizing/preventing ice buildup. When performing the manual defrost, it’s important that you don’t initiate the defrost if the doors have been opened within 30 minutes. Be sure the doors have remained closed for a minimum of 30 minutes before cycling the manual defrost. It’s usually best to do this first thing in the morning, as the unit will have remained closed overnight/should be at temp. The defrost cycle will run for approximately 25-35 minutes. **Defrost cycle times may vary depending on the make/model of your unit.
Install a Strip Curtain – This is not our preferred solution, as the curtain almost always gets in the way or sustains damage over time. Also, if it’s not installed properly, it’s not going to do much good. However, a curtain can help to keep the cold are in/the warm air out during door openings.
Perform Visible Inspections – It’s always a good idea to check the interior (where the airflow originates) to see if ice is visible. It’s easy to do and only takes a few minutes. When standing inside the unit, walk all the way to the front wall (end opposite the doors). If you notice that ice has accumulated on the floor in between the rails (where the front wall panel meets the floor), it’s time to deice the unit. You will also notice a hinged section of sheet metal near the floor. This is the air chute or baffle. Check behind this panel, as this is where the ice buildup will start to accumulate. If you notice that ice has built up behind the panel, it’s also time to deice the unit.
If you rely on reefer containers to store frozen product, then you can probably relate to what we’ve detailed above. Hopefully, this information helps you understand why this happens and how you can reduce it from occurring or prevent it all together.
Written on December 9, 2022